

If you are planning a graphics card upgrade, chasing a random shutdown, or just trying to figure out what is actually inside the PC you bought, learning how to check what PSU you have is the first step. The power supply unit is the one part in your PC that hides in plain sight. It has no flashy lights on most builds, it sits in a corner of the case, and unlike your CPU or graphics card, it does not show up in Windows. That leaves a lot of PC owners guessing, and guessing is a bad way to pick a new graphics card.
The good news is that finding your power supply is simple once you know where to look. In most cases the answer is printed on a label stuck to the side of the unit itself. If you own a prebuilt PC, you can often find the same answer on the maker’s support page or on your original receipt without opening anything. This guide walks through every method in order, from fastest to most certain, and explains what each number on the label actually means for your next upgrade.
To find out what power supply you have, read the label on the PSU itself. Shut the PC down, unplug it, remove the side panel, and look for the large sticker on the metal box where the power cord plugs in. The label lists the brand, the exact model number, the total wattage, the 80 PLUS efficiency rating, and the amperage on each voltage rail. If you own a prebuilt PC and do not want to open the case, look up the exact PC model or service tag on the manufacturer’s support page, or check your order confirmation and receipt. Windows, HWiNFO, CPU-Z, and similar tools cannot report the model or wattage of a standard power supply, because a normal PSU has no data connection to the motherboard.
Why Knowing Your PSU Matters Before You Upgrade
A graphics card upgrade is the most common reason people go looking for their PSU information, and it is also the moment when the answer matters most. Every graphics card has a recommended power supply wattage published by its maker, and a PSU that is too small for the card can cause crashes under load, random restarts, or a PC that refuses to boot with the new card installed. Knowing the wattage before you buy the card saves you from that unpleasant surprise.
The timing makes this more important than usual. GPU prices have been surging in late 2026, so a graphics card is a bigger purchase than it was a year ago, and the last thing you want is to spend that kind of money on a card your power supply cannot feed. Checking the PSU first costs ten minutes and can save you the cost of a second purchase, a return, or a rushed PSU order after the card is already in your hands.
Troubleshooting is the second reason. Random shutdowns, restarts during games, and strange behavior under heavy load are classic signs of a power supply that is struggling, and you cannot judge whether that is the cause until you know what unit is installed. A 450W unit running a hungry graphics card is a very different situation from a 750W unit doing the same job. Our guide to the warning signs of a struggling power supply explains what those symptoms look like in practice, but every diagnosis starts with the same step: identify the unit.
Warranty and resale are the quieter reasons. A power supply’s warranty follows the model, not the PC, so you need the exact model number to check how much coverage is left or to start a return. The same is true if you sell the PC: a buyer will ask what PSU is inside, and “I think it is 650 watts” is not an answer that builds trust. A photo of the label is.
Finally, there is the simple matter of planning. A PC is a system, and the PSU is the part that sets the ceiling for everything else. When you know the model, the wattage, the connector set, and the age of the unit, you can plan upgrades in the right order instead of discovering the limit halfway through a build. If the label shows a unit that is already close to its limit, that tells you the PSU upgrade comes before the graphics card, not after it.
Why Windows Cannot Tell You What PSU You Have
Most PC owners start in the same place: they open Windows and look for the answer. They check Settings, Device Manager, System Information, and Task Manager, and they find nothing. That is not a bug, and it is not because they looked in the wrong place. A standard desktop power supply simply has no way to report itself to the operating system.
Here is why. A CPU, a graphics card, a stick of RAM, and a storage drive all have a data connection to the rest of the system. They identify themselves when the PC boots, and Windows reads that information. A conventional PSU has no such connection. Its job is to convert wall power into the low voltage direct current your parts use, and it does that through power cables only. There is no data cable between a standard PSU and the motherboard, so there is nothing for Windows to read. The power supply sends power, not information.
That is why the familiar monitoring tools cannot help either. HWiNFO, CPU-Z, Speccy, and HWMonitor can show your CPU model, your graphics card, your motherboard, your memory, your temperatures, and even the voltages your PSU is delivering right now. What they cannot show is the brand, model, or rated wattage of the PSU, because that information was never sent to them. A voltage reading is a measurement of what is happening at this moment, not an identity card for the unit. A healthy 12 volt reading tells you the PSU is working at this moment, and it tells you nothing at all about whether the unit is a 500W model or an 850W model.
There are two narrow exceptions, and it helps to know them so you do not waste time chasing them. The first is a small group of premium digital power supplies from brands such as Corsair, ASUS, and Thermaltake, which have a USB or data connection to the motherboard and vendor software that can report the model and live power draw. If you own one of these and the data cable was connected during the build, the vendor’s software can identify it. That is the exception, not the rule, and it is covered in Method 4 below. The second exception is servers and some workstations, which use management tools that can report power supply information. That does not apply to a normal home gaming PC.
The practical takeaway is simple. If a website or a video promises a one click tool that detects any PSU, be skeptical. Software cannot read information that the hardware never sends. The reliable methods are physical or documentary: read the label, look up the prebuilt configuration, or find the purchase record. Everything else is a guess, and the rest of this guide shows you how to stop guessing.
Read the Label on the Power Supply
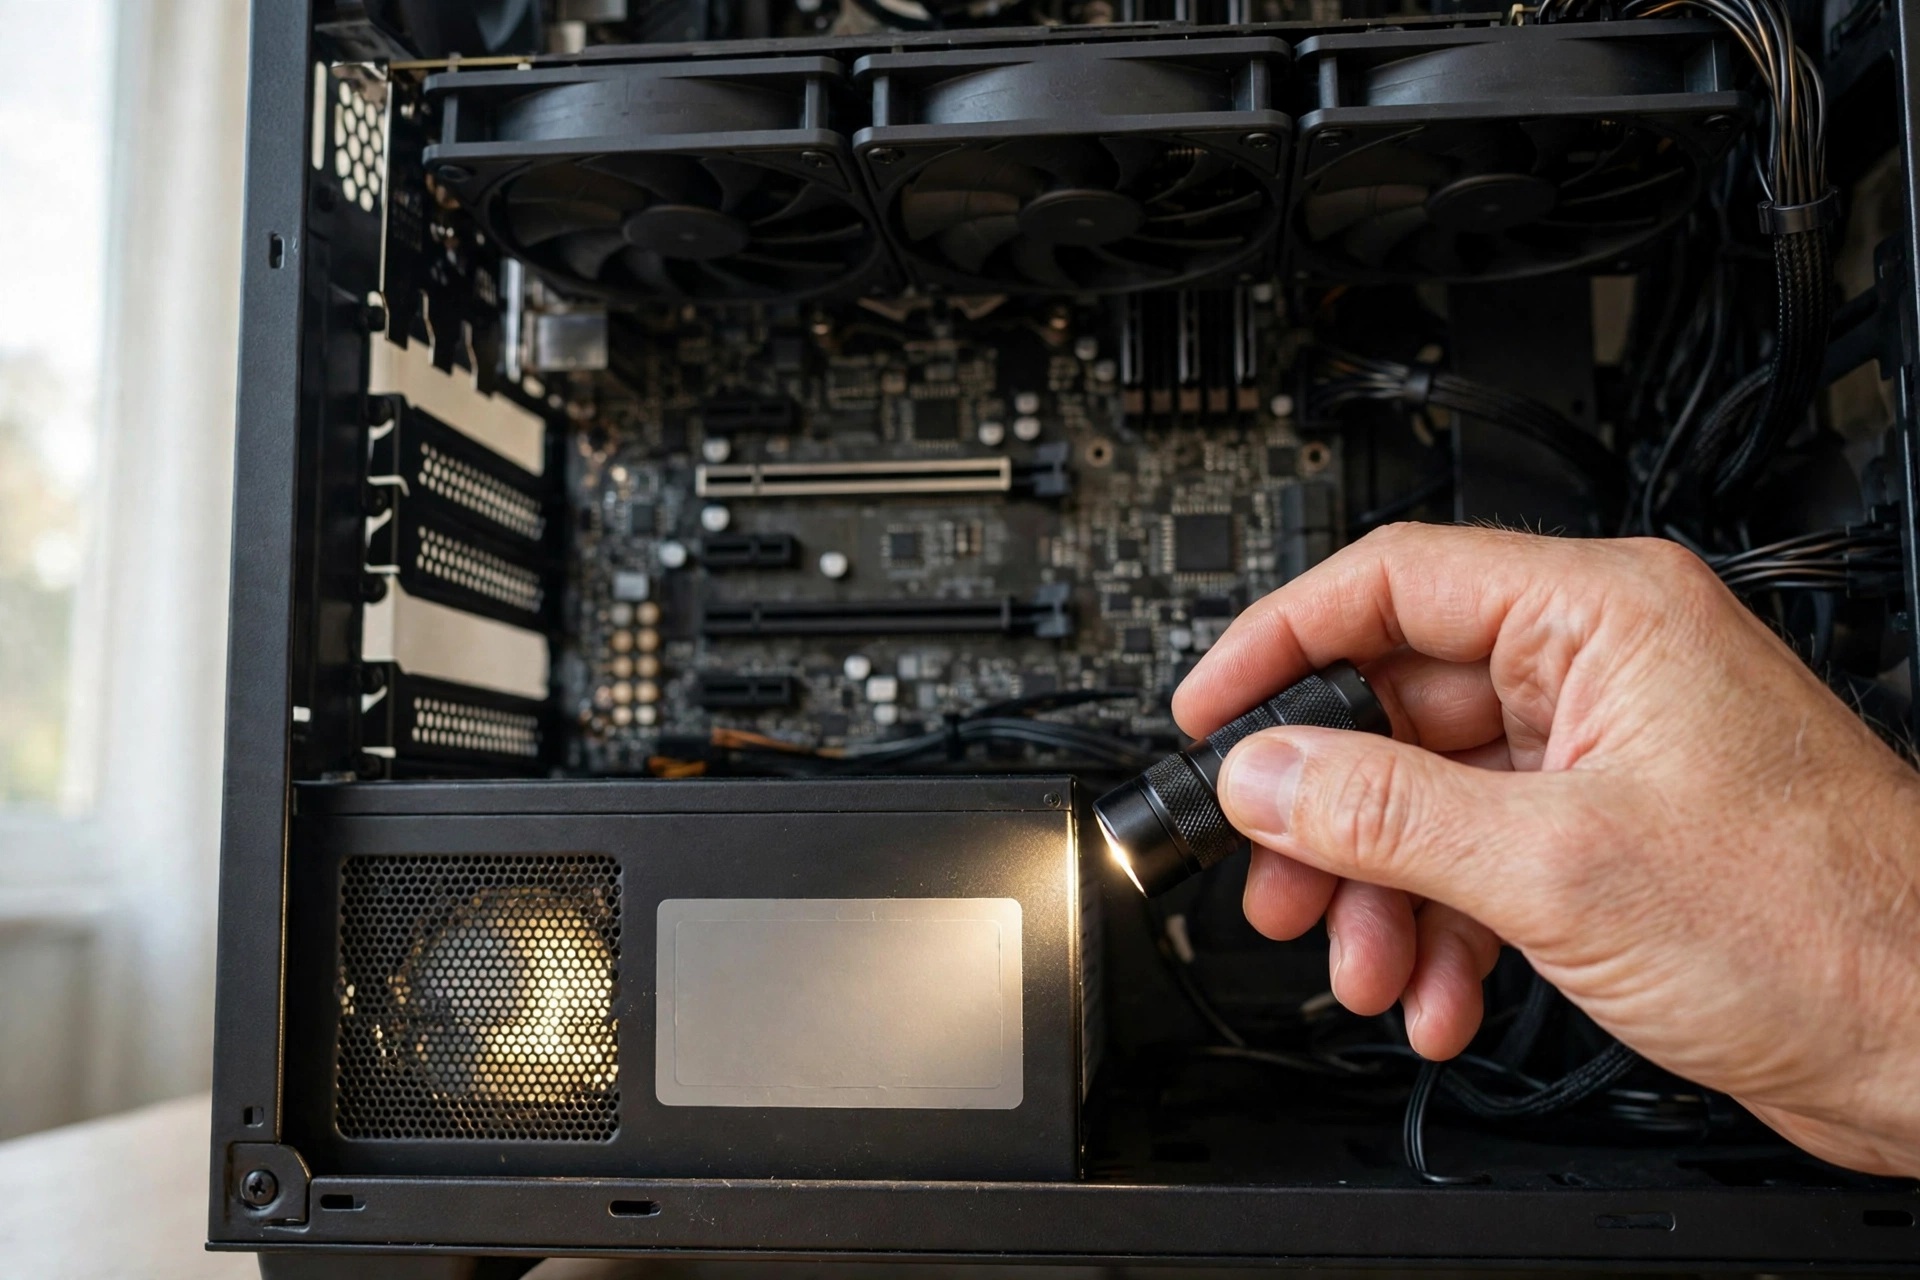
Reading the label is the most reliable method, and for a custom built PC it is the only method that gives you a certain answer. Every power supply sold by a legitimate maker carries a specification label, and that label is the unit’s identity card. The whole job takes about ten minutes, and most of that time is spent finding a screwdriver and a flashlight.
Shut Down and Unplug First
Safety comes before curiosity. Shut the PC down completely, not sleep or hibernate, and wait until the fans and lights are off. Flip the rocker switch on the back of the power supply to the off position if it has one, then pull the power cord out of the back of the PC. Unplug the other cables too if they are in your way, and take a quick photo of the back of the PC before you unplug anything so you can put every cable back where it belongs.
Do not open the metal power supply enclosure itself at any point. Everything you need is printed on the outside of the unit. The parts inside a PSU can hold a dangerous electrical charge even after the PC has been unplugged, and manufacturers warn users not to open the casing. You are opening the PC case, not the power supply. Those are two very different things, and only the first one is safe.
Before you reach inside, touch a bare metal part of the case to discharge any static electricity. That is a small habit that protects your components, and it costs nothing.
Find the PSU Inside the Case
The power supply is the metal box that the power cord plugs into, and it is usually at the bottom rear or the top rear of the case. You can follow the thick bundles of cables: they run from the PSU to the motherboard, the graphics card, and the drives. In many modern cases the PSU sits behind a metal shroud with vents, so you may only see its rear panel and its fan grill at first. That is normal, and the label is usually on one of the long sides of the unit.
Remove the side panel according to your case manufacturer’s instructions. Most cases use two thumb screws on the back edge, and the panel slides or swings off. If your case has a glass side panel, set it down on a soft surface so it does not scratch or crack. If the case has a PSU shroud, look for a vent or a cutout in the shroud. Some shrouds have an opening that shows the label, and some do not.
A flashlight helps a lot here. The inside of a case is dark, the label text is small, and a phone flashlight at an angle makes the print readable without moving anything. Take a photo of the label once you find it. The photo is useful twice over: you can zoom in on small print, and you have a record of the model for later, when you are looking up specifications or asking for help online.
What to Do When the Label Faces the Wrong Way
This is the most common frustration in this whole job, and it has a simple cause. Power supplies are often installed with the label facing the far side of the case, or facing down against a PSU shroud, so you can see the unit but not the sticker. Do not force anything, and do not remove the PSU unless you need to. Try the easy options first.
First, remove the other side panel. Many cases open from both sides, and the label is often readable from the back side of the case even when it is hidden from the front. Second, use your phone camera at an angle, or slide a small mirror into the gap, to read the label without moving the unit. A photo taken at an angle can often be rotated and zoomed until the model number is readable.
If the label is still hidden, you will need to slide the PSU out. Unplug the modular cables from the PSU if it is a modular unit, or label the fixed cables with tape if it is not, so you know where each one goes back. Remove the four screws that hold the PSU to the rear of the case, and slide it out just far enough to turn it and read the label. You do not need to remove it completely. The XDA guide to checking the power supply inside your PC shows this same process step by step for a case with a PSU shroud, including which side panel to remove first. When you are done, slide it back, refit the screws, reconnect the cables exactly as they were, refit the side panel, plug the power cord back in, and switch the PSU back on. Nothing in Windows changes, so there is nothing to undo in software.
If the PC is still under warranty, read the manufacturer’s instructions for opening the case first. Some prebuilt warranties allow opening the side panel and some do not, and you do not want to trade a warranty for a label. In that case, skip to Method 2 and use the support page instead.
How to Read the Label Line by Line
Once you can see the label, write down four things before anything else: the brand, the exact model number, the total wattage, and the 80 PLUS rating. The model number is the most important of the four, because it unlocks everything else. Two units can both say 750W on the box and be completely different inside, with different connectors, different warranties, and different quality. The model number is what lets you look up the real specifications on the manufacturer’s product page.
The total wattage is usually printed in the largest numbers on the label, often with a big W after it, such as 650W or 750W. That number is the maximum power the unit is built to deliver across all of its outputs combined, not the power your PC is using right now. Your PC only draws what it needs, so a 750W unit in a PC that needs 350W is not wasting 400W. It is simply a unit with room to spare. If you want to see two real labels decoded line by line, the Tom’s Hardware Power Supply 101 guide walks through the same fields on actual units, and it is a useful second opinion on anything that looks unfamiliar on your own label.
Below the wattage you will find a table of rails and amperage, and this is the part most guides skip. The label lists the voltage rails, usually plus 12V, plus 5V, and plus 3.3V, with a maximum current in amps for each one. Modern PCs draw most of their power from the 12V rail, which feeds the CPU and the graphics card, so the 12V number is the one that matters most for gaming. You can work out the 12V wattage yourself with simple multiplication: volts times amps equals watts. A label that lists 54 amps on the 12V rail means that rail can deliver about 648 watts, since 12 times 54 equals 648. That is an example of how the math works, not a specification for any particular unit. If the 12V capacity is far below the total wattage, the unit is an older design that splits its power across rails your parts barely use, and that is useful information when you judge whether it can handle a modern graphics card.
The 80 PLUS rating is the efficiency badge: Standard, Bronze, Silver, Gold, Platinum, or Titanium, in rising order. It certifies how much of the power pulled from the wall actually reaches your components, measured at 20, 50, and 100 percent load. A higher rating means less power wasted as heat, but it is an efficiency rating, not a quality rating. A Gold unit is not automatically better built than a Bronze unit. It is simply more efficient, and you should treat it as one data point among several.
The label also carries the AC input range, the form factor, and a set of safety and regulatory marks. The input range for a US unit is usually 100 to 240 volts, which means it works on American wall power without a voltage switch. Older or cheaper units sometimes have a small red voltage switch on the back, and that switch must be set correctly before you power on. The form factor is usually ATX, which is the standard size for desktop PCs, or SFX for small form factor builds. The manufacturing date is sometimes printed on the label or encoded in the serial number, and it matters because a power supply’s capacitors age, and a ten year old unit is a different proposition from a two year old one even if the wattage matches.
Check Your Prebuilt PC Specs Without Opening the Case
If you bought a prebuilt PC from Dell, HP, Lenovo, Acer, ASUS, MSI, or a system integrator such as CyberPowerPC or iBUYPOWER, you can often find the power supply without opening anything. The manufacturer knows exactly which parts went into your machine, and that information is published on its support page. This method works best when the PC has never been repaired or upgraded, because the page shows the original configuration, not the current one.
Start by finding the exact PC model. A family name alone is not enough, because the same product line can ship with several different power supplies. “HP Pavilion desktop” or “Dell XPS” can cover a 300W unit in one configuration and a 500W unit in another, so you need the precise model number or service tag. Look for a sticker on the back, bottom, top, or side of the case. It will list a model number, a product number, a serial number, or a service tag. Write down all of them.
You can also find the model in Windows, which is useful if the sticker is worn or hard to reach. Press Windows plus R, type msinfo32, and press Enter to open System Information. The System Summary page lists System Manufacturer and System Model, and those two fields are usually enough to search the support site. The same tool will not show the PSU itself, but it gives you the exact model you need to look the PSU up.
Then go to the manufacturer’s official support site and enter the model number or service tag. Open the specifications, the original configuration, or the service manual, and look for the power supply section. It will usually list the wattage and sometimes a part number. If the page lists more than one power supply option for your model, that means the model shipped with different units, and the page alone cannot tell you which one is in your machine. In that case, the label is the only certain answer, and you will need to open the case after all.
The same approach works for laptops, mini PCs, and all-in-one computers, with one difference: these machines usually have an external power adapter instead of an internal PSU. The wattage is printed on the adapter brick itself, on the label that lists the output voltage and current. You do not need to open anything to read it.
One warning applies to this whole method. If the PC has been upgraded or repaired, the original specification may no longer match the installed unit. A previous owner or a repair shop may have swapped the power supply, and the support page will never know. Treat the support page as a strong clue, and confirm it with the label whenever the answer matters, such as before a graphics card purchase. If you are buying a used prebuilt PC, the same rule applies with extra force: the seller’s word and the spec sheet are not the same as the label inside the case.
Find the PSU in Your Order History Receipt Build List
The paper trail is the easiest method of all when it works, because it needs no tools and no open case. If you built the PC yourself, the power supply was a separate purchase, and that purchase left a record. If you bought a prebuilt from a system integrator, the order confirmation often lists every component by name.
Search your email for the words “power supply” or “PSU” and look for the order confirmation from the store where you bought the parts. Online retailers such as Amazon and Newegg keep your order history for years, and the product listing will give you the exact brand and model. If you bought the parts at a local store, the paper receipt or the invoice may list the model, and the store may be able to look it up from the date and the payment record.
For a custom build, check your build list as well. Many builders keep a PCPartPicker list, a spreadsheet, or a notes file with the parts they chose, and the PSU is usually on it. If you posted the build on a forum or shared it with a friend, that post is another copy of the record. The same idea applies to a system integrator order: the confirmation email often includes a full component list, and the integrator’s support team can usually pull the build sheet from the order number if you ask.
The paper trail has the same weakness as the support page method. It tells you what was installed on the day the PC was built or bought, not what is installed today. If anyone has replaced the PSU since then, the receipt is out of date. It also fails completely if the PC was a gift, a hand-me-down, or a used purchase with no paperwork. In those cases, the label is the only reliable source, and Method 1 is the way to go.
Keep the record once you find it. Save the model number in a note on your phone, or keep the photo of the label with the rest of your PC paperwork. The next time you plan an upgrade, you will have the answer in seconds instead of starting this search all over again.
Check the Digital PSU Exception
There is one case in which software can identify your power supply, and it is worth a short section because it is the exception that confuses everyone. A small number of premium digital power supplies from brands such as Corsair, ASUS, and Thermaltake have a USB or data connection that links the PSU to the motherboard, and the vendor’s own software can read the model and report live information such as power draw, fan speed, and temperatures.
This only works if three things are true at the same time. First, the PSU must be a digital model, which is a feature of a small group of high end units, not a standard feature. Second, the data cable must have been connected inside the case during the build, which does not always happen even when the PSU supports it. Third, the vendor’s software must be installed, such as Corsair iCUE for a compatible Corsair unit. If any one of those three is missing, the software will show nothing, and that tells you nothing about the PSU except that this method does not apply to your PC.
If you think you might own a digital unit, check the model number on the label first, then look up whether that model has a digital interface. Do not install random “PSU detector” programs from the internet. Software cannot magically read model information that a standard power supply never reports, and a program that claims to do so is either guessing from your other parts or is software you should not trust. The safe tools are the vendor’s own applications, downloaded from the vendor’s own site, and only for a PSU that is actually a digital model.
For everyone else, which is almost everyone, the absence of a software answer is itself the answer. If HWiNFO shows no PSU entry, that is normal. It means you have a standard power supply, and the label, the support page, or the receipt is the way to identify it.
What the Label Tells You
The label packs a lot of information into a small space, and it is easier to use when you know which field answers which question. The table below covers the fields you will see on a typical modern ATX power supply label, and what each one means for your upgrade planning.
| Label field | What it tells you | Why it matters |
|---|---|---|
| Brand and model number | The exact unit, such as Corsair RM750x or Seasonic Focus GX-650 | Lets you look up the real specifications, connectors, warranty, and reviews |
| Total wattage | The maximum power the unit can deliver, such as 650W | The first check against a graphics card’s recommended PSU wattage |
| 12V rail amperage | How much current the main rail can deliver, such as 54A | Shows how much power is actually available to the CPU and graphics card |
| 80 PLUS rating | Efficiency certification, such as Bronze, Gold, or Platinum | Tells you how much power is wasted as heat, not how well the unit is built |
| AC input range | The wall voltage the unit accepts, such as 100 to 240V | Confirms the unit works on US wall power without a voltage switch |
| ATX version | The standard the unit follows, such as ATX 3.0 or ATX 3.1 | Tells you whether it has the modern 12V-2×6 connector for new graphics cards |
| Form factor | The physical size standard, usually ATX or SFX | Tells you whether a replacement unit will fit in your case |
| Manufacturing date | When the unit was made, sometimes in the serial number | An older unit may be near the end of its reliable life even if the wattage is fine |
| Safety marks | Certifications such as UL, CE, and TUV | Shows the unit was tested to recognized safety standards |
Two fields deserve a closer look, because they cause the most confusion. The first is the ATX version. The ATX 3.0 and ATX 3.1 standards introduced the 12V-2×6 connector, a single 16 pin plug that replaces the older 8 pin PCIe connectors on many new graphics cards. If your label shows ATX 3.1, your unit probably has that connector, and if it shows an older version, it probably does not. Our guide to the ATX 3.1 power supply standard explains the difference in detail, and it matters because a new graphics card may need that connector or an adapter.
The second is the 12V rail. Some labels show a single 12V rail with one amperage number, and some show several 12V rails with a separate limit for each. A single rail design is simpler to judge: multiply the volts by the amps and you have the wattage available to the CPU and graphics card. A multi rail design splits the power, and each rail has its own limit, so you need to check which connectors sit on which rail. Neither design is automatically better. What matters is whether the rail feeding the graphics card can deliver what the card needs, and the label is the only place that number is printed.
One more habit is worth building. When you look up the model number on the manufacturer’s product page, check the connector list as well as the wattage. A unit can have enough watts and still lack the right cables for the card you want, and that is a much cheaper problem to discover on a product page than after the card arrives. Independent PSU reviews are useful for the same reason: they test the unit under load and confirm whether it actually delivers its rated power. The TechPowerUp power supply review index is a good place to find a tested review of a specific model once you know what you have.
How to Identify a No Name OEM Power Supply
Sometimes the label is not there, or it cannot be read, and that situation needs its own plan. The first step is to be sure you have actually looked everywhere. Check all four sides of the unit, including the side facing the motherboard tray and the bottom, and use a flashlight at a low angle, which can make worn print readable. Dust is a common culprit: a label covered in dust can look blank until it is wiped gently with a dry cloth. Do not use water or cleaning spray inside the case.
If the label is genuinely missing, treat that as information, not just an inconvenience. Every legitimate power supply is required to carry a specification label, and a unit with no label at all is either a very old unit, a unit that was deliberately relabeled, or a no-name part that was never properly certified. None of those is a unit you should trust with an expensive graphics card. If the PC is a prebuilt, the manufacturer’s support page may still identify the unit by part number, and that is the next step. If that fails too, the honest answer is that the PSU is unidentified, and an unidentified PSU should be treated as a 300W to 400W unknown in your planning, not as a known quantity.
A no-name OEM part is a related problem. Many prebuilt PCs ship with a power supply that carries the PC maker’s name rather than a retail PSU brand, and the label may list a part number instead of a familiar model name. That is not automatically a bad unit, since large PC makers buy power supplies from established manufacturers, but it does mean the usual review sites will not have a listing for it. Search the part number itself, including the PC maker’s name, and check the prebuilt’s service manual, which often lists the PSU part number and wattage. If the part number turns up nothing at all, weigh the wattage on the label against the graphics card you want, and be more cautious than you would be with a reviewed retail unit. A unit with no reviews and no clear manufacturer is a reason to budget for a replacement, not a reason to push it harder.
When the label is unreadable because it is torn or faded, the serial number can sometimes save the day. The serial number is often printed on a separate small sticker, and the manufacturer’s support team can sometimes identify the unit from it. If that fails, and the PC is old enough that the label has faded, the age itself is part of the answer: a PSU that has been running for eight or ten years is near the end of its expected service life, and replacing it before a graphics card upgrade is the safer choice regardless of what the label once said.
If none of these routes works, ask for help with a photo. Post a clear photo of the unit, its cables, and any visible markings on a PC building forum such as r/buildapc, and someone will often recognize the platform or the OEM. That is a community identification, not a certainty, so treat it as a lead and confirm it against the manufacturer’s information before you spend money on a graphics card.
Is This PSU Enough for the GPU I Want?
Once you know what PSU you have, the next question is the one that motivated the whole search: can it handle the graphics card you want? Answer it in three checks, in this order, and do not skip any of them.
The first check is wattage. Look up the graphics card’s recommended power supply wattage on the card maker’s product page, and compare it with the total wattage on your label. If the card maker recommends a 750W PSU and your label says 650W, the card is not a safe match for your current unit, even if the PC might boot with it. Recommended wattage figures include headroom for power spikes, and running close to the limit is how random shutdowns happen. For current NVIDIA cards, our RTX 50 series power supply guide lists the recommended wattage card by card, so you can use the same check for any card you are considering.
The second check is connectors. A modern graphics card may need one, two, or three 8 pin PCIe connectors, or a single 16 pin 12V-2×6 connector. Count the connectors coming from your PSU and compare them with what the card needs. Adapters exist, and they can work, but an adapter does not create power that is not there, and a card that needs two separate 8 pin cables should get two separate cables, not one cable split two ways. If your unit is an older ATX version without the 12V-2×6 connector, check whether the card ships with an adapter in the box and whether your unit has enough 8 pin cables to feed it.
The third check is the 12V rail and the age of the unit. Multiply the 12V amperage on the label by 12 to get the wattage available to the CPU and graphics card, and compare that number with the combined draw of your parts. Then factor in age. A five year old unit that was good when new is not the same as a new unit with the same label, because capacitors age and the unit’s real capacity drifts down over time. If your unit is old, running near its limit, and about to feed a card that costs more than the PSU itself, replacing the PSU first is the cheaper insurance.
The market context matters here too. With GPU prices surging in late 2026, a graphics card is a major purchase, and the PSU is a small fraction of that cost. Spending a little more on a suitable power supply before installing an expensive card is a better use of money than risking the card on a unit that cannot feed it. The same logic applies to the memory market: the ongoing RAM and memory shortage has pushed builders to plan full system upgrades more carefully, and the PSU is part of that plan, not an afterthought. If you are pricing a whole upgrade, price the PSU at the same time as the RAM and the graphics card, and you will not be caught short.
If all three checks pass, you can buy the card with confidence. If any one of them fails, the PSU upgrade comes first. Our power supply tier list ranks current units by quality and is a good starting point when you need a replacement, and the ATX 3.1 guide explains which modern standard to look for in a new unit.
| Check | Where to find it | Pass or fail |
|---|---|---|
| Recommended PSU wattage | Graphics card maker’s product page | Pass if your label wattage meets or beats it |
| Power connectors | Count the PCIe cables from your PSU | Pass if you have the right plugs, with no splitting |
| 12V rail capacity | Amps on the label times 12 volts | Pass if it covers the CPU plus graphics card with room to spare |
| Age and condition | Manufacturing date and any symptoms | Fail if the unit is very old or already causing shutdowns |
Common Mistakes to Avoid
The first mistake is trusting a software reading. If a program claims to show your PSU model, it is almost certainly showing something else, such as the motherboard model, or it is estimating from your parts list. The only programs that can identify a PSU are the vendor apps for digital units, and those only work with a matching digital PSU and a connected data cable.
The second mistake is reading the wrong number on the label. The biggest number is usually the total wattage, but some labels print the peak wattage in large type and the continuous wattage in smaller type. Continuous wattage is the number that matters, because it is what the unit can deliver all day, not for a few seconds. If the label shows two wattage figures, use the continuous one for your planning.
The third mistake is judging a unit by wattage alone. Two 750W units can be very different: one may be a well reviewed unit with a ten year warranty, and the other may be a no-name unit that struggles to deliver its rated power. Wattage is the starting point, not the whole story. The model number, the reviews, and the warranty tell you the rest.
The fourth mistake is forgetting the PSU shroud. Many builders look into the case, see the shroud, and conclude the label is not there. It is there, just hidden, and removing the far side panel or sliding the unit out a short distance is usually enough to read it. Do not buy a new PSU because you could not see the label on the first try.
The fifth mistake is opening the PSU itself. This one is not a waste of money, it is a safety risk. The label is on the outside for a reason, and there is nothing inside the metal box that you need to see. If the label is damaged, use the support page, the receipt, or the serial number instead.
The sixth mistake is assuming the prebuilt spec sheet is current. A spec sheet describes the PC on the day it left the factory. If a previous owner upgraded the graphics card, or a repair shop replaced the PSU, the sheet is history, not fact. Confirm with the label before you spend money.
Frequently Asked Questions
How can I tell if the PSU on a new PC is as good as my current PSU?
Compare the two labels, not the two wattage numbers. Write down the brand, model, total wattage, 12V amperage, 80 PLUS rating, and ATX version for each unit, then look up both models for reviews and warranty length. A new PC with a 650W unit from a reviewed brand and a ten year warranty is a better unit than a 750W no-name unit with no reviews, even though the wattage number is lower. The label comparison takes five minutes and tells you more than any single number can.
How do I know if my GPU isn’t working or if my PSU doesn’t have enough power?
The symptoms overlap, which is why this question comes up so often. A graphics card problem usually shows up as visual artifacts, driver crashes, or poor performance in games, while a power supply problem usually shows up as sudden shutdowns, restarts under load, or a PC that will not boot with the card installed. The first step is to identify your PSU using the methods in this guide, then compare its wattage and 12V capacity with the graphics card’s recommended power supply. If the PSU is well below the recommendation and the shutdowns happen under heavy load, the PSU is the likelier cause. Testing the card in another PC is the surest way to separate the two, but most people do not have a second PC, so the label check is the practical first step.
Can I check my PSU wattage in Windows Settings?
No. Windows Settings, System Information, Device Manager, and Task Manager do not list the power supply, because a standard PSU has no data connection to the motherboard. System Information can show your PC model, which you can use to look up the PSU on the manufacturer’s support page, but Windows itself never reports the wattage or the model.
Does HWiNFO show my power supply model?
No, not for a standard power supply. HWiNFO can show voltages, temperatures, fan speeds, and power draw from the CPU and graphics card, but it cannot show the PSU model or rated wattage, because the PSU never sends that information. The only exception is a digital PSU with a USB data connection and the vendor’s software installed, and HWiNFO is not the tool for that case.
What does 80 PLUS Gold mean on my PSU label?
It means the unit is certified to convert at least 80 percent of the power it pulls from the wall into power your parts can use, with the exact efficiency measured at 20, 50, and 100 percent load. Gold sits above Standard, Bronze, and Silver, and below Platinum and Titanium. It is an efficiency rating, not a quality rating, so a Gold unit is not automatically better built than a Bronze unit. Use it as one data point alongside the model, the reviews, and the warranty.
My prebuilt lists two different PSU wattages. Which one do I have?
The spec page lists the options the model shipped with, not the unit in your machine. You need the label to settle it. Open the case using Method 1, or give the manufacturer your exact service tag or serial number and ask which PSU was fitted to your specific unit. Do not guess, because the difference between the two options can be the difference between a card that works and a card that crashes.
Is it safe to remove the PSU to read the label?
Yes, if you do it correctly. Shut the PC down, switch the PSU off, unplug the power cord, and touch a bare metal part of the case before you reach inside. Unscrew the four mounting screws, slide the unit out just far enough to read the label, and put it back exactly as it was. Never open the metal PSU enclosure itself, and never work inside the case while the PC is plugged in.
How often should I replace my power supply?
There is no fixed schedule, and a good unit can last a decade. Replace it when the label shows a wattage or connector set that no longer fits your parts, when the unit is old enough that its capacitors have aged, or when it shows symptoms such as shutdowns under load. If you are installing a graphics card that costs several times more than a new PSU, and your current unit is old or unreviewed, replacing the PSU at the same time is the safer choice.
Key Takeaways
Your power supply is the one part Windows cannot identify, so the answer is never in Settings. Read the label on the unit for a certain answer, or use the prebuilt support page and your purchase record when you do not want to open the case. Write down the brand, the exact model number, the total wattage, the 12V amperage, and the 80 PLUS rating, and look the model up before you buy a graphics card. Treat a missing label or a no-name unit as a warning, not a mystery to ignore. And never open the PSU enclosure itself: everything you need is printed on the outside.
Conclusion
Learning how to check what PSU you have is a small job with an outsized payoff. Ten minutes with a screwdriver and a flashlight gives you the model, the wattage, and the connector set, and those three facts decide whether your next graphics card will run happily or crash under load. Start with the label, fall back to the support page or the receipt when the label is out of reach, and remember that no software tool can do this job for a standard power supply. Once you know what is inside your PC, you can plan the upgrade with confidence, and you will never again have to guess at the part that powers everything else.

Leave a Reply