

A good gaming pc setup starts with the room, not the parts. Put your monitor at eye level about an arm’s length away, give your mouse room to move, route cables under the desk, and place the PC where its fans can breathe. Spend most of your money on the PC and monitor, then add comfort pieces like a good chair and a monitor arm. Use this setup gaming guide as a checklist and work through it one step at a time.
Introduction
Most people shop for a gaming pc setup the wrong way around. They pick the graphics card first, the case second, and the desk last, if they think about it at all. Then the PC arrives, and the problems start. The monitor sits too low, the mouse runs out of desk space mid-fight, cables pile up behind the tower, and the chair hurts after an hour. The PC itself might be fast, but the setup around it fights the player every session.
A gaming pc setup is the whole desk, not just the tower. It is the monitor, the keyboard, the mouse, the headset, the chair, the lighting, the cables, and the air moving around the case. When those pieces work together, games feel better even on the same hardware. When they do not, even a strong PC feels awkward to use.
This guide covers the desk side of a gaming computer setup only. It does not repeat the build itself. If you still need to choose parts or put a tower together, start with our complete gaming PC build guide and come back here once the PC exists. Everything below assumes you already have a PC, or you are buying one, and now you need to set up the space around it.
If this is your first pc set up, start with the desk. A good desk and a good monitor position fix more daily annoyance than any single part upgrade. That is what the best gaming setup feels like: comfortable, tidy, and easy to use. Work through the steps in order, and you will end up with a full pc setup that feels comfortable for long sessions and is easy to upgrade later.
What a Full Gaming PC Setup Includes
A full gaming pc setup with monitor has more parts than most first-time buyers expect. Before you spend anything, write down what you already own and what is missing. That list stops you from buying a second headset when what you really need is a monitor arm.
A complete setup usually includes these pieces:
- A gaming PC tower with the parts inside it
- A monitor, or two, with the right cables
- A keyboard and a mouse, plus a large mousepad
- A headset or speakers, and a microphone if you talk to teammates
- A desk with enough depth and width for all of it
- A chair you can sit in for hours without pain
- A monitor arm or stand, a power strip, and cable management gear
- Lighting, a headset stand, and small extras like a USB hub
Your pc configuration matters, but the room around it matters too. A strong gaming pc configuration cannot fix a monitor that sits too low or a mouse that keeps sliding off a tiny desk. The best gaming computer setup is the one where every piece fits the space and the way you play.
Step 1: Choose Your Desk and Room Spot
Pick the room spot before you buy the desk. The best corner in the room is usually the one with a wall behind the desk, a power outlet close by, and no direct sunlight on the screen. Sunlight on a monitor washes out the picture and makes dark game scenes hard to read. If the only free wall faces a window, plan for blinds or a curtain.
Measure the wall before you shop. A single monitor setup fits on a desk about 48 inches wide, but it feels tight once a keyboard, mouse, and headset join it. A desk 55 to 60 inches wide with about 30 inches of depth is the sweet spot for most players. That depth matters more than people think. A shallow desk pushes the monitor too close to your face and leaves no room for your wrists.
Desk height is usually fixed at about 29 to 30 inches, which suits most adults. If you are much taller or shorter than average, a height-adjustable desk solves more problems than a fancy chair. Standing desks also let you change position during long sessions, which your back will notice by the third hour.
Leave space behind the desk. You need room for cables to drop down, for the PC to sit beside or under the desk, and for air to move. A desk pushed flat against the wall with no gap makes cable work miserable and traps warm air behind the tower. Two or three inches of clearance is enough.
Takeaway: measure the wall, check the outlet, and block the sun before you buy anything. That is the foundation of the best pc setup for your room.
Step 2: Place Your Monitor the Right Way
Monitor placement is the single biggest comfort win in any gaming desktop setup, and it costs nothing. Get this right and everything else feels easier.
Put the monitor directly in front of you, not off to one side. Your eyes should meet the top third of the screen when you sit up straight. If you look down at the screen like it is a laptop, your neck will ache within an hour. A monitor arm or a stack of books under the stand fixes the height in minutes. A monitor arm is the better long-term fix because it also frees desk space and lets you pull the screen closer or push it back.
Distance matters as much as height. Sit about an arm’s length from the screen, roughly 20 to 28 inches for most monitor sizes. Bigger screens need more distance. Use this as a starting point, then adjust until text looks sharp and you can see the whole screen without turning your head.
| Screen Size | Suggested Viewing Distance |
|---|---|
| 24 inch | 20 to 24 inches |
| 27 inch | 24 to 30 inches |
| 32 inch | 30 to 36 inches |
| 34 inch ultrawide | 28 to 36 inches |
These are general starting points, not exact rules. Your eyesight, the games you play, and your desk depth all change the right distance. Competitive shooters often feel better a little closer, while story games feel better a little farther back.
Your monitor choice shapes the whole setup. A high refresh rate panel only helps if your PC can push enough frames to use it, so match the monitor to the PC you own. If you are unsure whether your screen is holding your PC back, read our guide on whether your monitor can bottleneck your PC before buying a new one. For a deeper look at picking the right panel, our gaming PC deals guide also covers when monitor bundles are worth the money.
Connect the monitor with the right cable. DisplayPort is the usual pick for high refresh rate gaming on PC, while HDMI works well for most setups and for consoles. We compared both in detail in our HDMI vs DisplayPort guide, so check that before you buy a long cable you do not need.
Takeaway: center the screen, raise it to eye level, and sit an arm’s length away.
Step 3: Multi-Monitor Setups That Actually Help
A second monitor is the most common upgrade after the first setup is done, and it is also the most misunderstood. A second screen does not make you faster in a game. It makes everything around the game easier: chat, guides, music, stream controls, and system monitoring stay visible without minimizing your game.
The best layout keeps the main monitor centered and the second monitor slightly to the side, angled inward. Keep the top edges of both screens close to the same height. Do not put the second screen so far away that you have to turn your whole head to read it. A small angle, about 30 degrees, is enough.
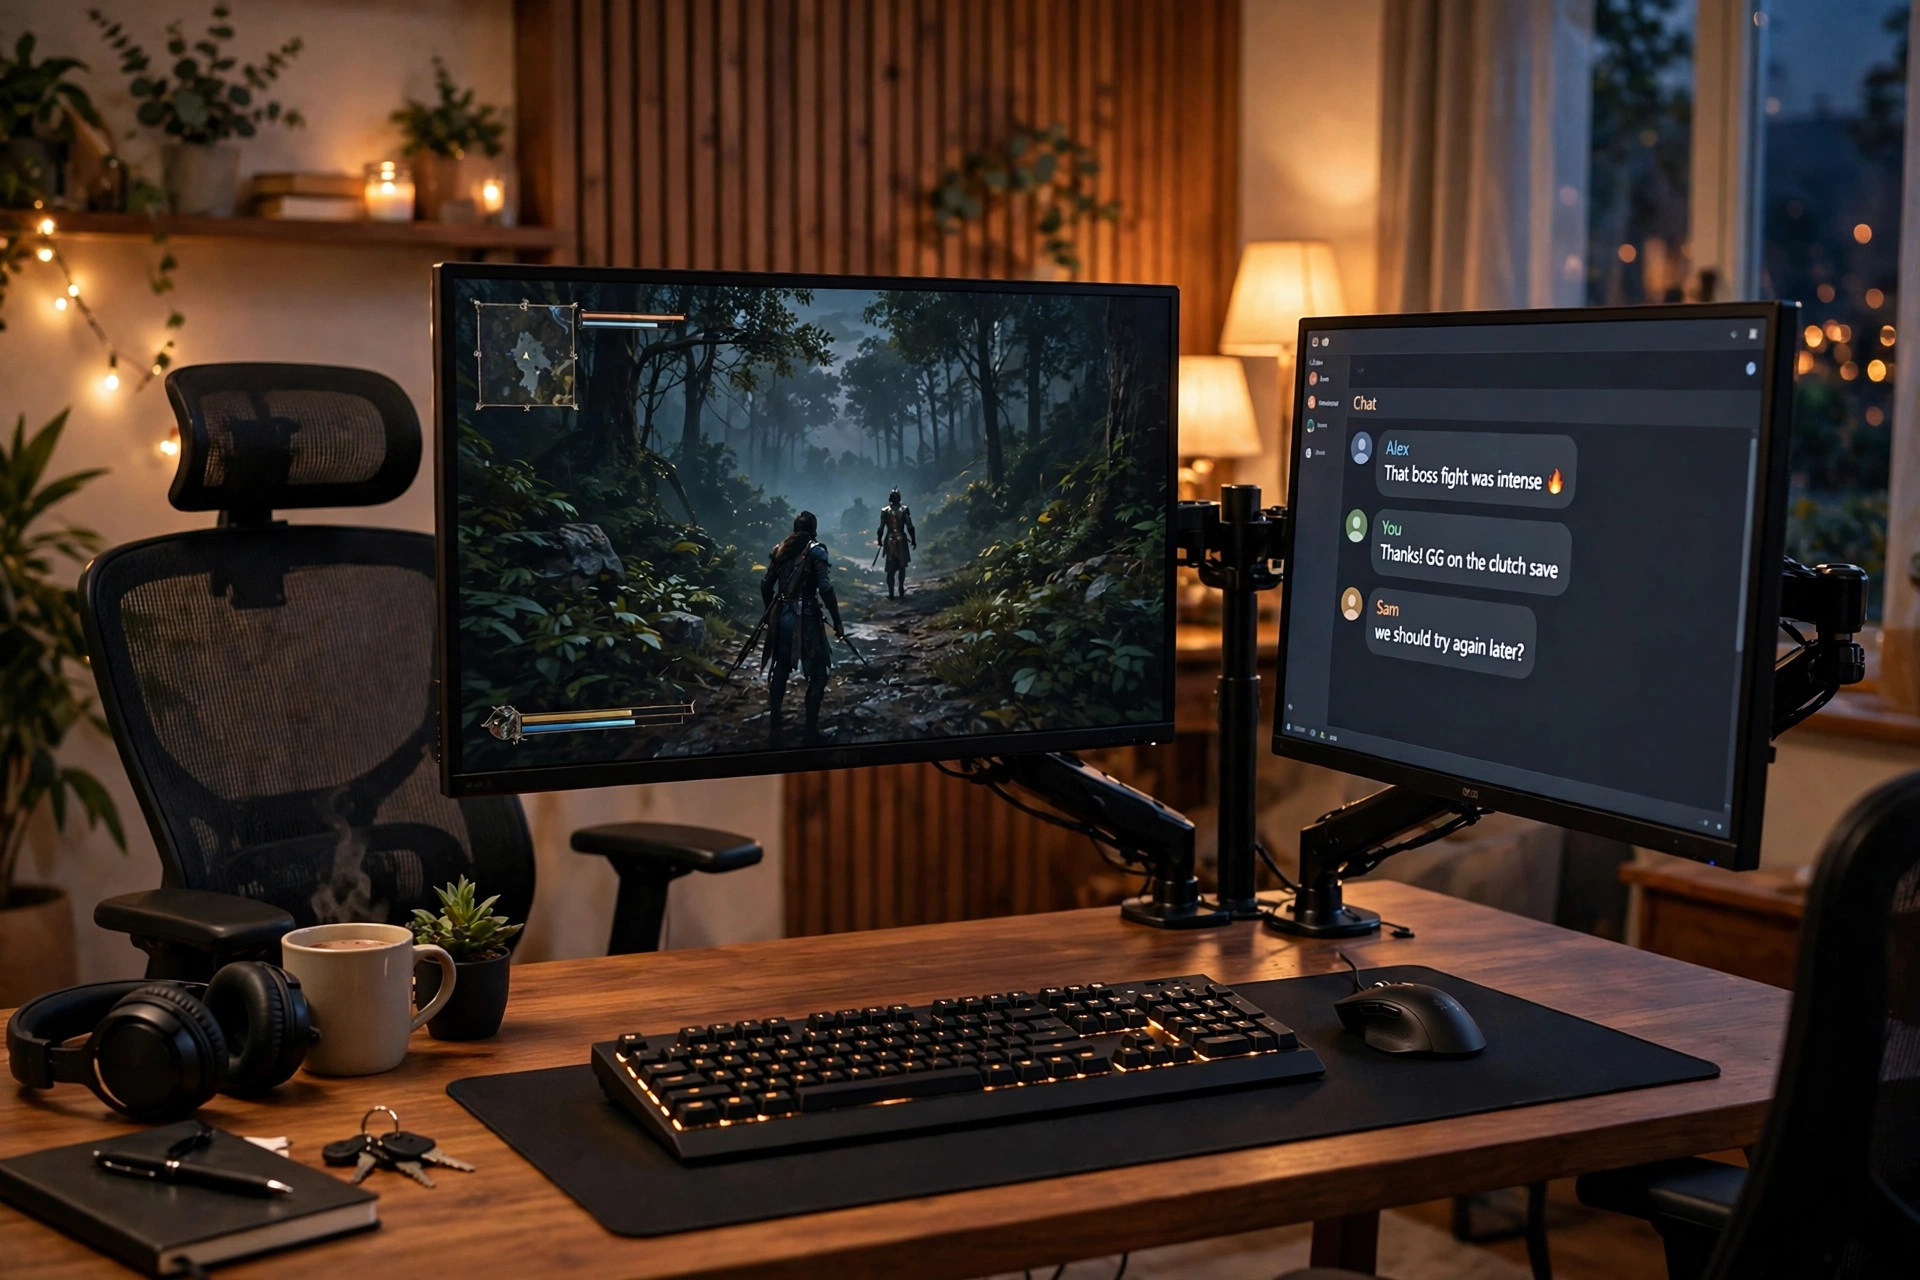
Three layouts cover almost every player:
- Side by side. The main monitor sits directly in front of you and the second sits to one side. This is the best default for gaming plus chat or streaming controls.
- Portrait secondary. Rotate a second monitor upright for long pages, chat, code, or guides. Portrait is poor for games, but it is excellent for reading.
- Stacked. One monitor sits above the other to save desk width. This works only if the top screen is used for quick glances, because looking up for long stretches strains the neck.
Connect both monitors to the graphics card, not one to the card and one to the motherboard, so both run from the same GPU. In Windows, set the display mode to Extend and pick your gaming monitor as the primary display. Make sure the on-screen arrangement matches the physical arrangement, so your mouse moves between screens in the direction you expect.
A second monitor barely affects gaming performance when it shows light apps like chat or a browser. Heavy apps on the second screen, like a video render or a second game, can cost frames. If you notice stutter after adding a screen, check whether something heavy is running on it. Our guide on whether a second monitor bottlenecks gaming explains the details and the fixes.
Skip the second monitor if you only play one game at a time and never look away from it. The extra screen becomes clutter instead of help. Spend that money on a better main monitor instead.
Takeaway: center the gaming screen, angle the second screen inward, and give it a fixed job.
Step 4: Pick Peripherals That Fit Your Hands
Peripherals are personal. A keyboard that feels perfect to one player feels mushy to another. Try before you buy when you can, and pay attention to your hands, not to the marketing.
Start with the mousepad. A large pad, about 36 by 18 inches, covers the keyboard and mouse and gives low-sensitivity players room for wide swipes. Small pads force you to lift the mouse mid-fight, which is a real disadvantage in shooters. This is the cheapest meaningful upgrade in any gaming pc setup.
For the mouse, grip matters more than the sensor. Palm, claw, and fingertip grips all want different shapes. A mouse that is too big will cramp your hand, and one that is too small will make your fingers curl. Weight matters too. Many competitive players prefer lighter mice, but some players aim better with a little weight. There is no universal right answer, only the shape that fits your hand.
For the keyboard, think about size first. A full-size board has a number pad. A tenkeyless board drops it and gives your mouse more room. A 60 percent board drops even more keys and suits small desks. Mechanical switches feel different from membrane keys, and switch types feel different from each other, so test a few if a store near you has a display wall.
For audio, a headset with a clear microphone is the practical pick for team games. Speakers sound better for single-player games, but they pick up game audio on your microphone and annoy teammates. If you stream or record, a headset is the safer choice. A headset stand or a hook under the desk keeps the cable from tangling.
Wireless peripherals are now good enough for most players, with battery life measured in days, not hours, on many models. Wired gear still wins on price and on never needing a charge. A sensible mix is wireless mouse and headset for freedom, wired keyboard for reliability. Keep a charging cable routed to the desk so the mouse never dies mid-match.
Takeaway: fit the mouse to your grip, give the mouse room with a large pad, and choose keyboard size by desk space.
Step 5: Cable Management in One Afternoon
Cable management is not decoration. Loose cables snag, pull, and block airflow, and a cable that yanks a monitor off a desk costs far more than a pack of velcro ties. Set aside one afternoon and do the desk and the case in the same session.
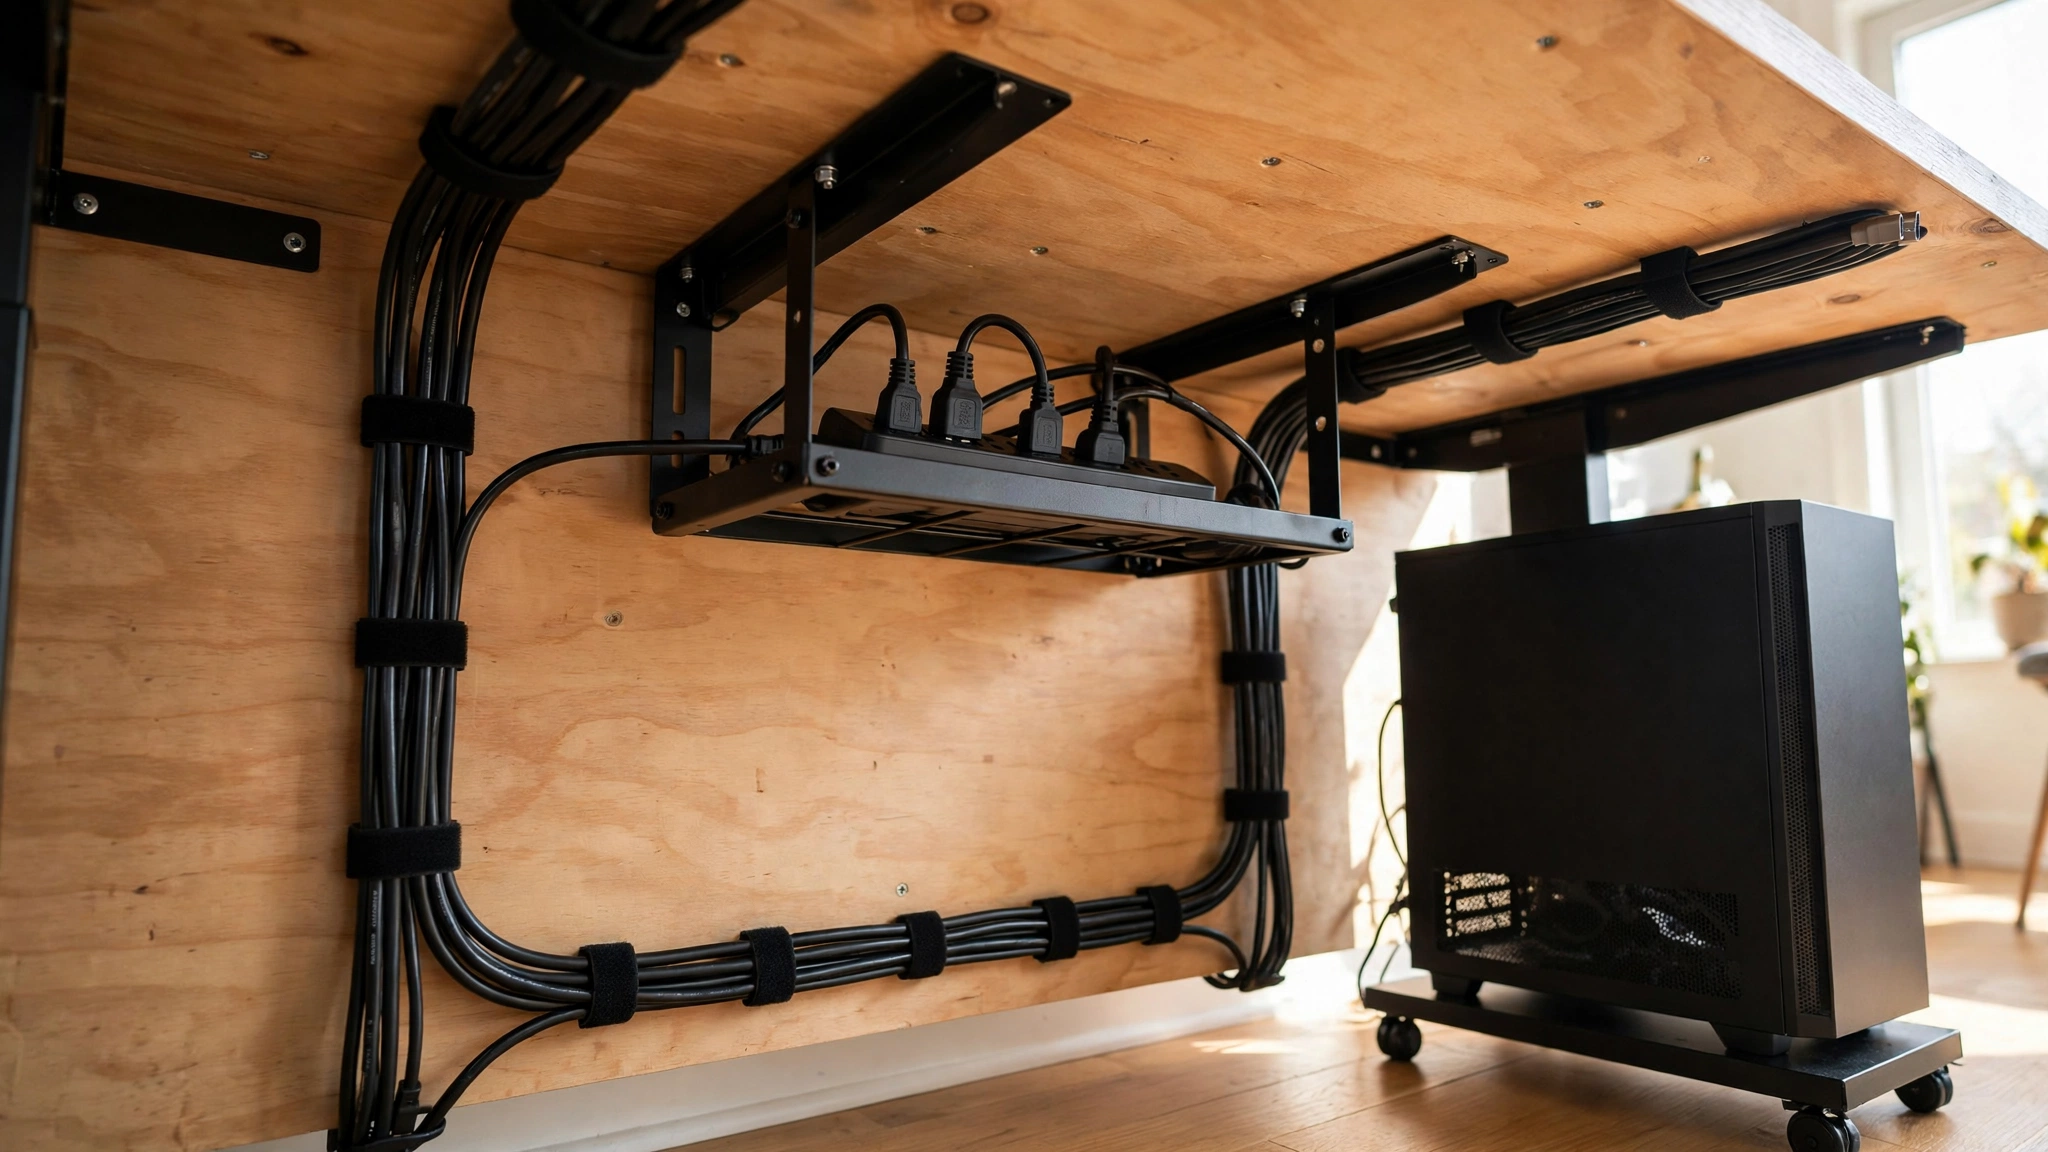
Work in this order:
- Unplug everything and sort by destination. Lay cables in three piles: wall power, PC and display, and peripherals. Throw away cables you no longer use.
- Mount the power strip under the desk. A strip on the floor collects dust and gets kicked. A strip in an under-desk tray keeps plugs off the floor and easy to reach.
- Run display cables first. Route the monitor cable along the monitor arm or the back edge of the desk, with enough slack for the arm to move. Do not zip-tie a cable tight to a moving arm.
- Split the rest into two bundles. Power cables go in one bundle, data and audio cables in another. Velcro ties beat plastic zip ties because you will change something later, and velcro opens without cutting.
- Leave a service loop. Leave a little slack where cables meet the power strip so nothing pulls tight when you move the desk or the PC.
Inside the case, route cables behind the motherboard tray where the case allows it, and keep them away from intake fans. A case stuffed with cables blocking airflow can raise component temperatures a few degrees. You do not need a perfect showpiece interior. You need clear paths for air.
If your desk has no cable hole, a cheap adhesive cable clip on the back edge works fine. If the desk is a standing desk, leave extra slack in a U-shaped loop so cables never pull tight at full standing height.
Takeaway: route first, tie second, and use velcro so future changes stay easy.
Step 6: Ergonomics: Chair, Desk Height, and Posture
Long sessions punish bad posture. Ergonomics sounds boring until your wrist hurts for a week, so set the chair and desk up properly on day one instead of after the first ache.
Sit with your elbows at roughly 90 degrees and your wrists straight, not bent up or down. Your feet should rest flat on the floor, with your knees at roughly 90 degrees. If the desk is too high and the chair is too low, your shoulders creep up toward your ears. If the chair is too high, your feet dangle and your legs go numb.
A good chair matters more than a racing-style look. Look for adjustable seat height, adjustable armrests, and lumbar support that actually touches your lower back. A chair that fits you beats a famous brand that does not. If a new chair is out of budget, a lumbar pillow and a footrest fix the two most common problems for very little money.
Take short breaks. No chair fixes eight hours of sitting without moving. Stand up, stretch, and look away from the screen for a few minutes every hour. Your eyes and your back both recover faster with small breaks than with one long break at the end of the night.
The monitor arm helps here too. When the screen sits at eye level, you stop hunching forward, and your shoulders stay down. That one change fixes more neck pain than any chair upgrade.
Takeaway: elbows at 90 degrees, feet flat, screen at eye level, and move every hour.
Step 7: Lighting That Helps Instead of Distracting
Lighting changes how a setup feels at night, and it changes how tired your eyes get. The goal is even, soft light, not a light show.
Avoid a bright light behind the monitor shining into your eyes, and avoid total darkness with a bright screen. Both make your eyes work harder. A soft lamp behind or beside the monitor, or a light strip on the wall behind the desk, evens out the contrast between the screen and the room.
RGB lighting is fun, but keep it subtle. A gentle glow behind the monitor or under the desk looks good and does not distract. Bright flashing effects in your peripheral vision pull attention away from the game and get tiring fast. If your peripherals have lighting controls, set them once and leave them alone.
Bias lighting, a soft light behind the monitor, also helps the screen look better in a dark room. It does not need to be expensive. A simple LED strip on the back of the desk or the wall does the job.
If you stream or record video, light your face separately with a soft light in front of you. A bright screen alone makes webcams produce grainy, washed-out video. A small desk lamp aimed at the wall in front of you is a cheap fix.
Takeaway: soft, even light beats bright flashing RGB every time.
Step 8: Airflow and Where to Put the PC Tower
Where the PC sits changes its temperatures. A tower on the floor pulls in dust and pet hair, and a tower inside a closed cabinet cooks itself. Give the case room to breathe.
The best spots, in order, are on the desk, on a small stand beside the desk, or on the floor only if it sits on a raised platform with clear space around its intakes. Never push the case flat against a wall on the intake side. Leave a few inches of clearance on every vented panel.
Keep the case away from heaters and direct sunlight. Warm room air already makes cooling harder, and a sunny window adds heat all afternoon. If the room gets hot in summer, a small fan moving air through the room helps the PC as much as it helps you.
Dust is the slow enemy. Check the intake filters every month or two and clean them. A PC full of dust runs hotter and louder, and its fans work harder for the same cooling. Keep drinks away from the tower and the desk edge. One spilled glass can end a PC faster than any overheating problem.
If your room is small, a compact case on the desk can work well, as long as its vents stay clear. What matters is airflow, not case size. A big case with blocked vents cools worse than a small case with open ones.
Takeaway: raise the case off the floor, keep vents clear, and clean the dust filters regularly.
Step 9: Dual PC Setup for Streaming
A dual pc setup for streaming means two computers: one plays the game, the other handles the stream. The gaming PC sends its video to the streaming PC through a capture card, and the streaming PC encodes and uploads the stream. The game PC keeps all of its power for the game, so the stream never costs frames.
Most streamers do not need this. A single strong PC handles gaming and streaming at the same time for most people, especially with modern graphics cards that include a dedicated encoder. NVIDIA GeForce RTX cards, for example, include hardware encoding that takes the streaming load off the main processor, and you can read the current lineup on NVIDIA GeForce. A dual PC setup makes sense only when the stream itself is demanding, like high-quality 1080p at 60 frames per second with heavy overlays, alerts, and a camera, while the game also needs every frame.
A dual PC setup needs extra gear and extra space. You need a second PC, a capture card, a second monitor or a way to share one, a second keyboard and mouse or a switch, and desk space for all of it. The audio routing also gets more complex, because game audio, microphone audio, and alerts all need to reach the right PC. Budget for all of that before you commit.
A simpler middle step is a second monitor on a single PC, with streaming software running on the same machine. Try that first. If the stream still drops frames or the game stutters, then consider a second PC. Many streamers find the single-PC setup is enough once they lower the stream output settings a little.
If you do build a dual PC setup, place the streaming PC where you can reach its ports, keep its cables in a separate bundle from the gaming PC, and label both sets. Two PCs with identical black cables become a puzzle the first time something unplugs.
Takeaway: try single-PC streaming first. Add a second PC only when the stream itself is the bottleneck.
Gaming PC Setup Price What Each Budget Tier Buys
The gaming pc setup price is the number most people get wrong, because they price the tower and forget the rest. A tower is only part of the setup. The monitor, desk, chair, and peripherals add hundreds of dollars, and forgetting them is how a budget falls apart at checkout.
The bands below are planning ranges for new gear in the United States, based on typical late 2026 street prices reported by cost guides. Prices move weekly, especially for graphics cards, so treat these as a starting point and check current prices the week you buy. Tax and shipping are extra.
| Tier | PC and Monitor | Desk and Extras | Full Setup Price Range |
|---|---|---|---|
| Budget gaming setup | 1080p high refresh tower, 24 inch 1080p high refresh monitor | Simple desk, wired keyboard and mouse, headset | Often about $1,000 to $1,600 |
| Mid-range, best for most people | 1440p high refresh tower, 27 inch 1440p high refresh monitor | Sturdy desk, monitor arm, mechanical keyboard, good headset | Often about $1,500 to $2,500 |
| High-end | Strong 1440p or careful 4K tower, fast premium or OLED monitor | Standing desk, dual monitors, premium peripherals, streaming gear | Often about $2,800 to $4,500 or more |
A gaming pc setup cheap enough to fit a tight budget is possible, but only if you are honest about what is included. The best cheap gaming pc setup is usually a modest tower, a 1080p high refresh monitor, and wired peripherals, with the desk and chair you already own. An affordable pc gaming setup gets much harder when you also need a desk and a chair, so count those first.
The pc setup price also depends on timing. High-end graphics cards have been hard to find at normal prices in late 2026, with the top RTX 5090 models selling far above their launch price at some retailers while NVIDIA has confirmed the card is not discontinued. That shortage pushes high-end setup costs up and makes the mid-range tier the sensible pick for most buyers right now. If you already own a decent graphics card, the mid-range tier gets cheaper fast, because the monitor and desk are the only big purchases left.
The gaming setup price for a streamer is higher, because a second monitor, a microphone, a camera, and lighting all add up. The best specs for a gaming pc used for streaming include extra memory for running the game and the streaming software at once. Valve’s October Steam Hardware Survey showed 16GB of system memory overtaking 32GB as the most common setup among surveyed players, which is a useful reminder that 16GB remains the practical minimum for gaming, while streamers and heavy multitaskers should consider more.
Where should the money go first? Spend the most on the PC and the monitor, because those decide how games look and feel. Spend next on the chair and the desk, because those decide how long you can play comfortably. Spend last on lighting and decoration, because those change nothing about performance.
Takeaway: price the whole desk, not just the tower, and check current prices the week you buy.
Common Mistakes to Avoid
Most setup problems come from the same few mistakes. Avoid these and the setup will feel right much sooner.
- Buying the monitor last. The monitor decides what you actually see. A strong PC on a small, slow monitor wastes the PC. Pick the monitor with the PC, not after it.
- A desk that is too small. Measure the wall and the gear. A desk that fits the monitor but not the mousepad forces bad posture every session.
- Cables with no slack. Tight cables pull connectors loose and break ports. Leave a service loop everywhere a cable moves.
- The PC on the carpet. Carpet blocks the bottom intake and feeds dust into the case. Raise the PC on a stand or put it on the desk.
- Chasing RGB before comfort. Lights look good in photos. A good chair and a monitor arm feel good every day. Buy comfort first.
- Two monitors with no plan. A second screen with no fixed job becomes a distraction. Give it one role, like chat or stream controls, and keep it there.
- Ignoring the chair. A cheap chair costs more in back pain than a good chair costs in money. Sit in it before you buy it when you can.
Your Setup Checklist
Use this list when the gear arrives. Check each item off before your first long session.
- Desk measured, placed, and level, with a power outlet nearby
- Monitor centered, at eye level, at arm’s length, on an arm or a stable stand
- Second monitor angled inward with a fixed job, if you have one
- Keyboard and mouse on a large pad with room for full swipes
- Headset on a stand, microphone tested, audio levels checked
- Power strip mounted under the desk, cables bundled in two groups with velcro ties
- PC raised off the floor with clear space around every vent
- Chair adjusted so elbows sit at 90 degrees and feet rest flat
- Lighting soft and even, no bright light shining into your eyes
- Display cable is DisplayPort or HDMI as planned, both monitors connected to the graphics card
- Drivers updated and refresh rate set correctly in display settings
- A quick game tested for comfort, not just for frames
Frequently Asked Questions
How much does a full gaming PC setup cost?
A full gaming pc setup with monitor usually costs about $1,000 to $1,600 at the budget end, about $1,500 to $2,500 in the mid-range most people should buy, and about $2,800 to $4,500 or more at the high end. Those are planning ranges for new gear in the United States, and they include the PC, monitor, desk, chair, and peripherals. Prices move weekly, so check current prices the week you buy. If you already own a desk and a chair, the total drops a lot.
Is a dual monitor setup worth it for gaming?
A dual monitor setup is worth it if you multitask while gaming or stream. It keeps chat, guides, music, and stream controls visible without minimizing your game. It is not worth it if you only play one game at a time and never look away, because the second screen becomes clutter. A second monitor barely affects gaming performance when it shows light apps, but heavy apps running on it can cost frames.
How far should I sit from my gaming monitor?
Sit about an arm’s length away, roughly 20 to 28 inches for most monitor sizes. A 24 inch screen usually feels right at 20 to 24 inches, a 27 inch screen at 24 to 30 inches, and a 32 inch screen at 30 to 36 inches. Move closer for competitive shooters and a little farther back for story games, and adjust until you can see the whole screen without turning your head.
Should I put my gaming PC on the desk or on the floor?
On the desk is best when space allows, because it keeps the case away from dust and makes ports easy to reach. A small stand beside the desk is the next best option. The floor is fine only if the PC sits on a raised platform with clear space around its air intakes. Never put the case directly on carpet, and never push it into a closed cabinet where warm air has nowhere to go.
Do I need a second PC for streaming?
Most streamers do not need a second PC. A single strong PC handles gaming and streaming at the same time for most people, especially when the graphics card handles the encoding work. A dual pc setup for streaming makes sense only when the stream is demanding and the game also needs every frame. Try single-PC streaming first, and add a second PC only if the stream drops frames or the game stutters.
What size desk do I need for a gaming setup?
A desk about 55 to 60 inches wide and 30 inches deep suits most single-monitor setups and leaves room for a large mousepad. Add width for a second monitor, and add depth if your monitor is large. Measure your gear before you buy, and leave two or three inches of clearance behind the desk for cables and airflow. A height-adjustable desk is worth considering if you are much taller or shorter than average.
Key Takeaways
- A gaming pc setup is the whole desk, not just the tower: monitor, peripherals, chair, cables, lighting, and airflow all matter.
- Put the monitor at eye level, centered, about an arm’s length away, and match it to what your PC can actually run.
- Give the mouse room with a large pad, keep cables in two velcro-tied bundles under the desk, and raise the PC off the floor.
- Price the whole desk before you buy, and spend the most on the PC and monitor, then on the chair and desk.
- Try single-PC streaming first. A second PC is an upgrade for demanding streams, not a starting point.
Conclusion
The best gaming pc setup is not the most expensive one. It is the one that fits your room, your body, and the games you play. A monitor at the right height, a mouse with room to move, cables that stay out of the way, and a PC that can breathe will make every session better, and they cost far less than a new graphics card.
Start with the desk and the monitor position, because those two changes are free and they fix the most daily annoyance. Then work through the checklist one item at a time. When the setup feels comfortable for a long session and easy to change later, it is done. For the parts inside the tower, our complete gaming PC build guide covers the build itself, and our best tablet for gaming guide covers a good second screen for cloud gaming on the couch. For current prices, check Tom’s Hardware monitor and component guides, and AMD for current graphics card options, before you buy.

Leave a Reply